Reading Time: 4 minutes
That’s how the configurations for the above example look like from the backend: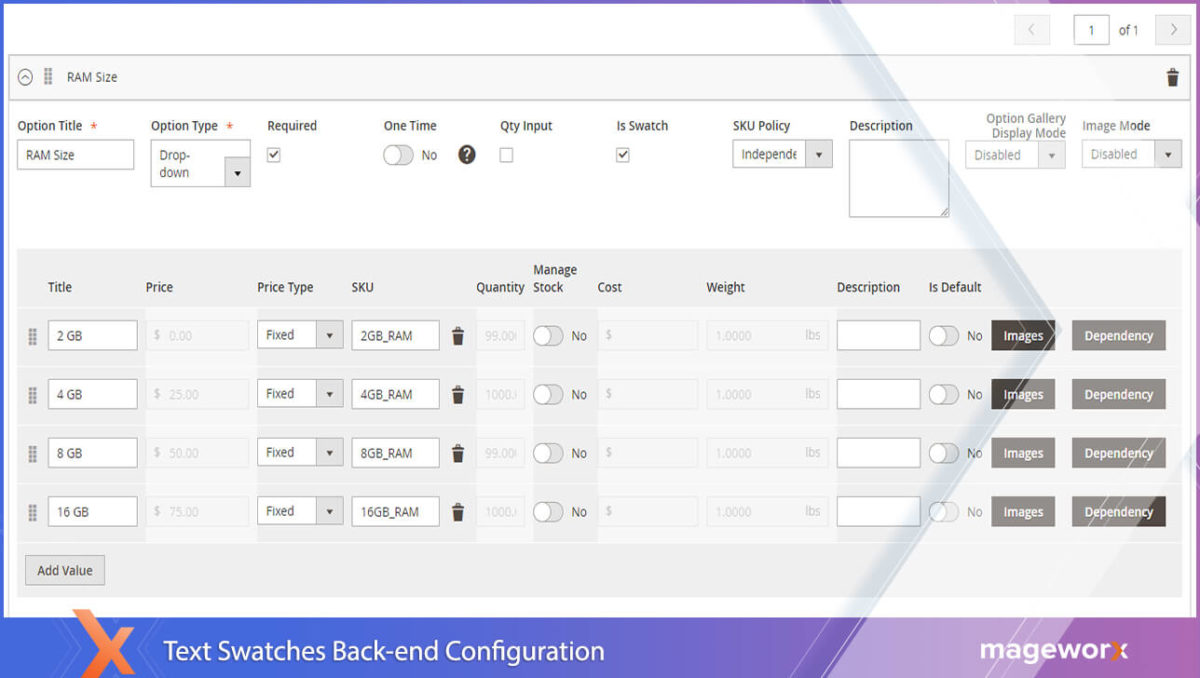
Additionally:
To do that:
Table of Contents
What are Swatches and their Basic Types?
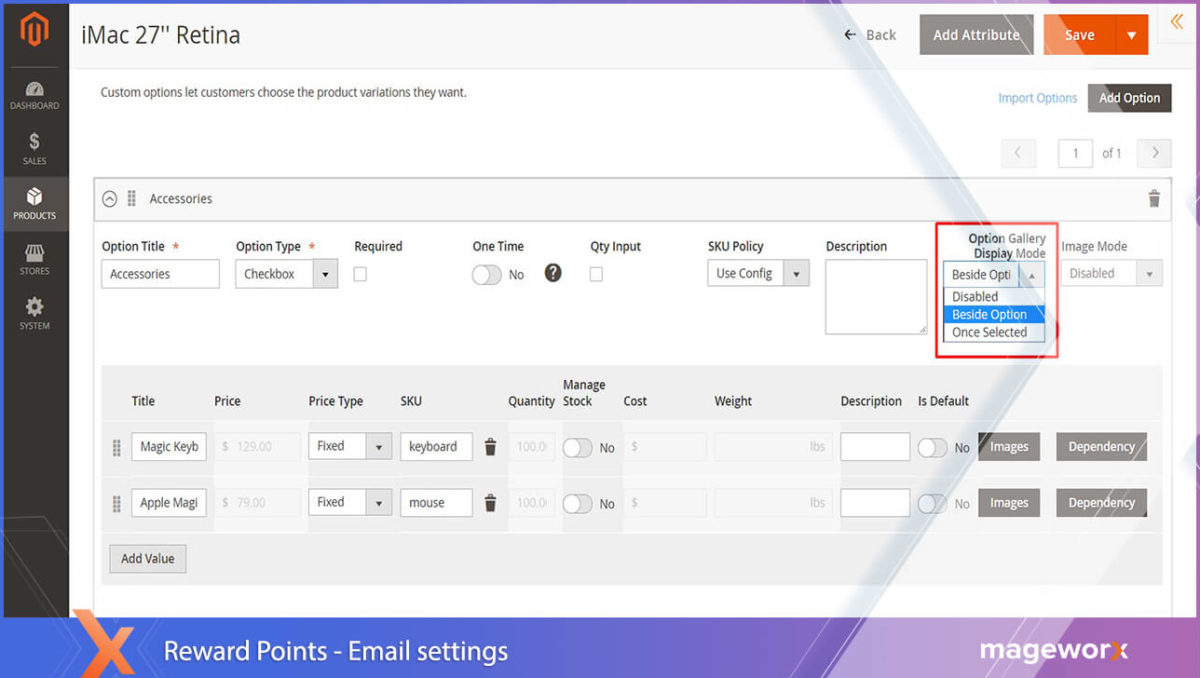
When this Gallery Display Mode is selected, images get displayed as thumbnails near/below product options:
Taking that 92% of consumers say visuals are the top influential factor affecting a purchase decision, the shoppers can be quite sensitive to how a product looks in different variations, from various angles.
Color Swatch
To reach the functionality and set up the swatches for the product options in your Magento 2 store,
Image Swatch (aka Visual Swatch)
When disabled, no images will be naturally shown.
Text Swatch
Proceed to the option Magento image gallery you’ve just uploaded, and then click the one you wish to use as an overlay.
How Can You Expand Default Magento 2 Functionality?
Thus, the option image will cover the main product image.
- on the product page
- in product listings, and
- layered navigation.
Swatches are the feature that allows for presenting product options by displaying the corresponding visual representation when selected.
The Option Gallery Mode regulates the way the images are shown in product options. It gives you the benefit of displaying products in a way that suits your target audience the most.
In order to create image swatches, you’ll need to select Base when configuring image roles.
 Need more help with product swatches? Feel free to leave a comment below, we will be happy to assist!
- Add image swatch
- Add text swatch
- Replace the standard product images with the one of an option
- Use multiple images for a single option
- Display option images in the preview tooltip
- Create an image overlay effect
Example 1. Text & Image Swatches. Preview Tooltip.
The drop-down menu has been chosen as an option type.
- adding text and image swatches
- displaying option images in the preview tooltip
The basic configurations are within the Customizable Options tab.
Let’s learn more about Magento image optimization and how to make it an instant crush using image, color, and text swatches in Magento 2.
Magento 2, by default, enables the users to set up swatches solely for the configurable products:
In the following example, we’ll show you how to implement such actions as This option hides all the product variants images, and allows displaying them right after they get selected:
select a product you wish to add swatches to.
The configurations are hidden within the Customizable Options tab.
Let’s learn how to configure the extension in order to:
go to Products – Inventory – Catalog.
They grab the customers’ attention and shape their decision-making behaviors.
The way you display your offerings online is positively associated with the revenue level and can cost you clients.
The way you display your offerings online is positively associated with the revenue level and can cost you clients.
In fact:
Example 2. Standard Product Image Replacement with Option Image
The basic configurations are within the Customizable Options tab.
The following result you’ll achieve on the frontend:
The following result you’ll achieve on the frontend:
The following result you’ll achieve on the frontend:
However, to make the variants look like regular text swatches, you’ll need to select the Is Swatch check box.
Images for SSD type are displayed both as Base and Tooltip when moused over.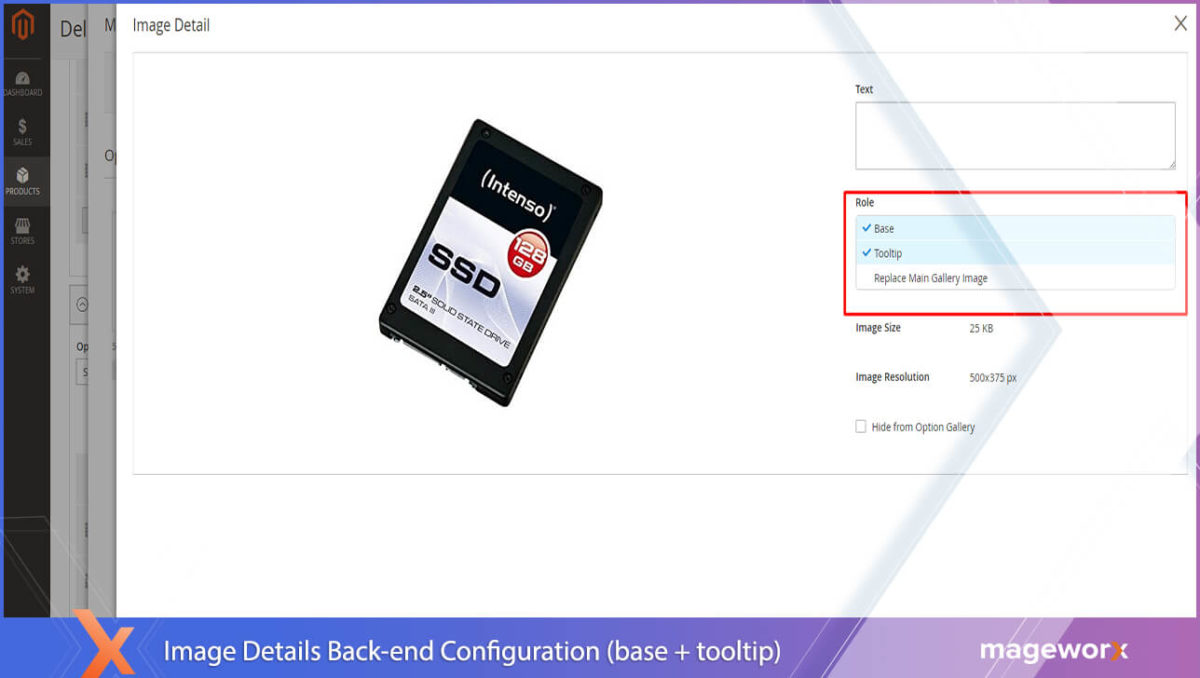
As you can see:
You may want to use images as a tooltip for your options.
Option Gallery Mode and its Benefits
*Note that Magento doesn’t allow product custom options for bundled products.
With the extension, there’s no need to create configurable products to offer product variations any longer.
Please, consult this post to learn how to use the default Magento 2 functionality to configure the swatches.
Beside Option
That’s how they look like in the backend:
Once Selected
Click the option image, and select one out of the available options―which is Tooltip in our case. To do that, upload the corresponding pictures for each option separately (that’s where you can upload multiple images to show your offerings in full), and choose the tooltip value after the image(s) that has been uploaded.
When there are no particular Magento product images to be displayed, you can use ‘buttons’ with text values for product attributes. This swatch works just the same way as the color one.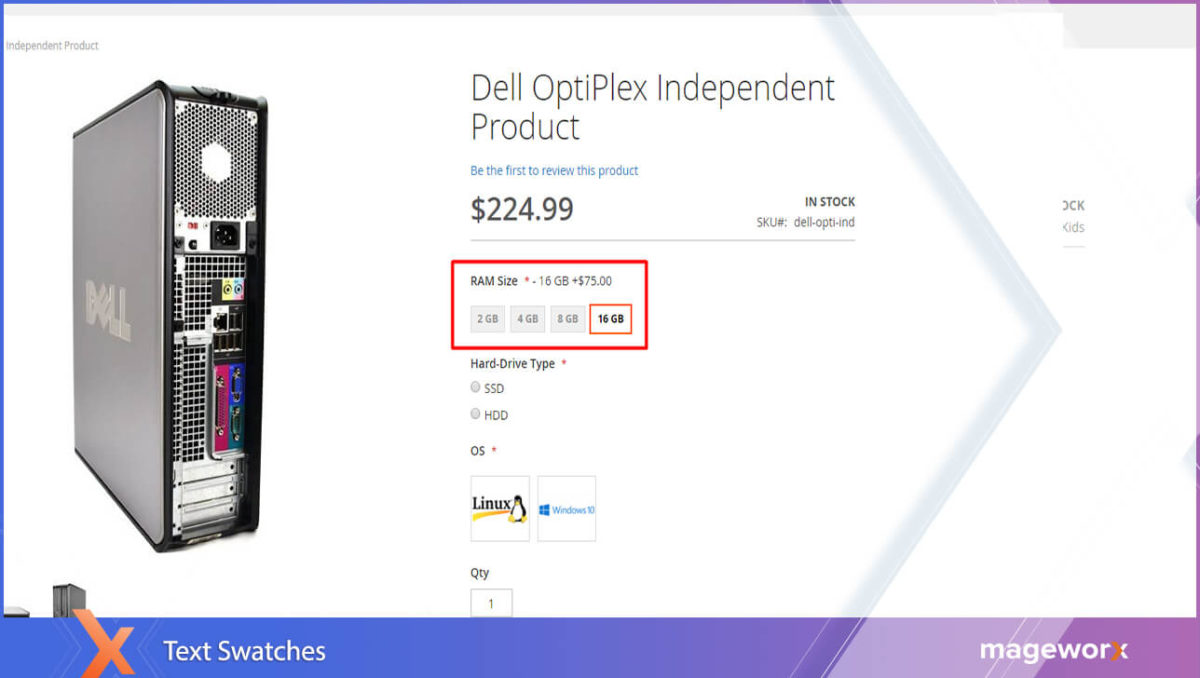
Wrap Up
Let’s consider one more example.
Make sure Image Mode is set to Replace’ .Replace Main Gallery Image should be selected within the image roles.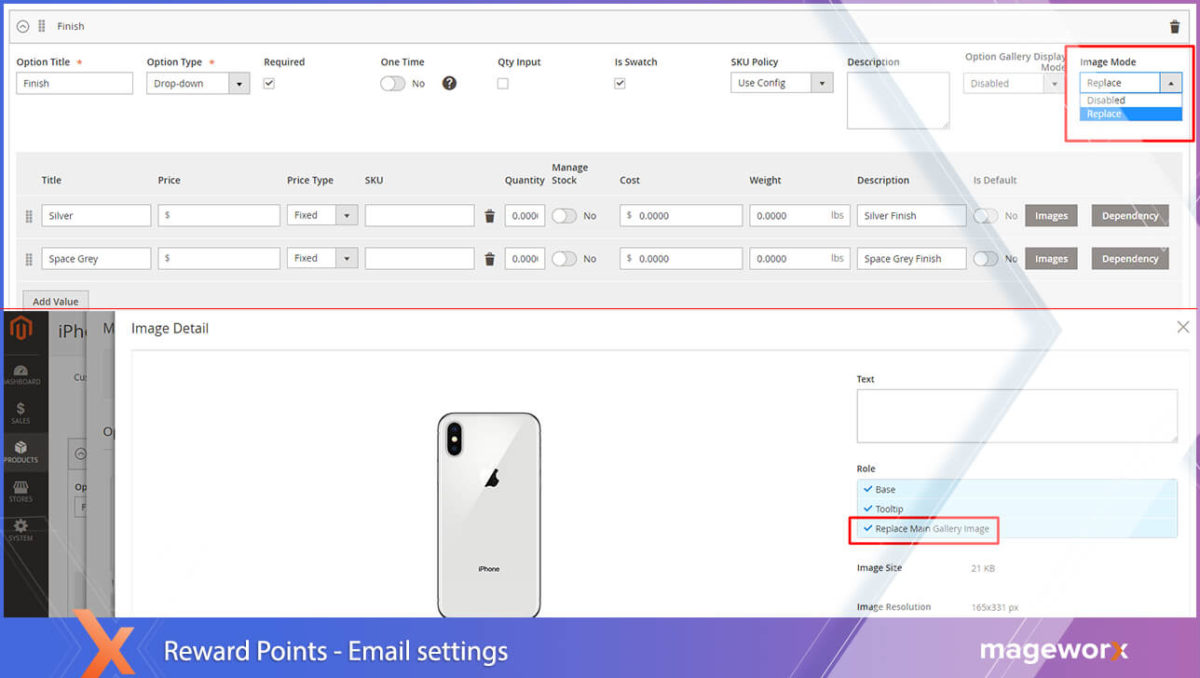
Here:
Let’s take a closer look at the available display options: