Table of Contents
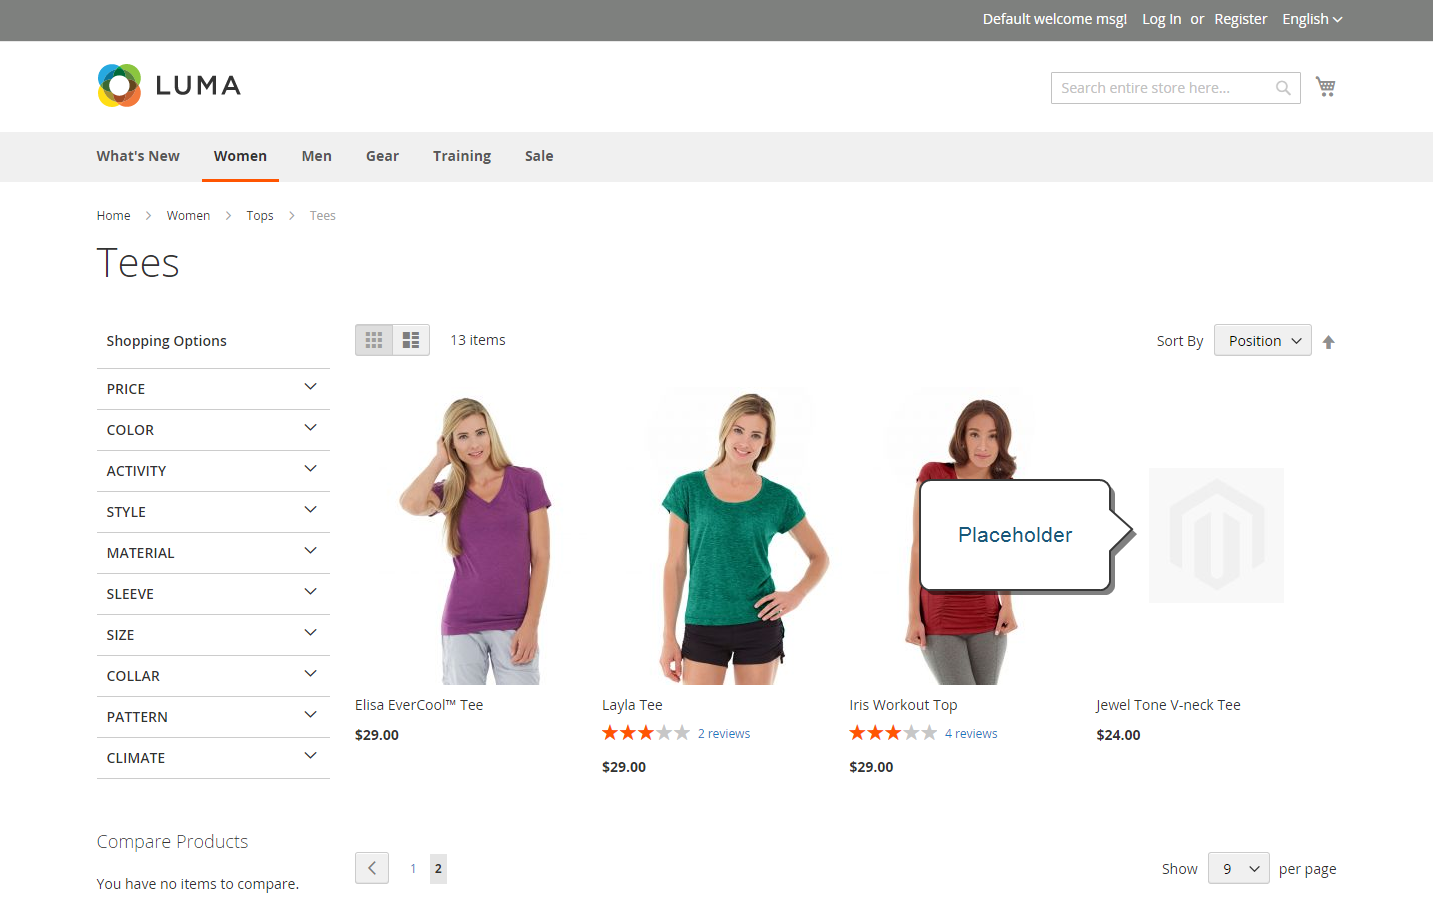
Magento 2 Placeholder Image is a temporary image on the product list page until the official product image is available.
You may need Magento 2 Placeholder Images in these cases:
What Is Magento 2 Placeholder Image?
As you know, it’s crucial for your website to have a fast loading speed. However, sometimes, when you have so many heavy images on your website, it can slow the website.
This tutorial shows you the simplest way to change or upload placeholders in Magento 2.
Step 1: On the Admin sidebar, go to Stores > Settings > Configuration.
- The product image is not ready, but you want to go live the product page to get better SEO results and trigger customers’ attention.
- You want to test the front end when the full content is not ready.
- There are some technical issues, but you don’t want customers’ experience to be interrupted.
How To Change Magento 2 Placeholder Image?
This extension allows you to choose where you want to change the image format. You can choose to convert on the product page, category page, home page or CMS page.
Magento 2 Convert Images to WebP by BSS makes the process of converting WebP easier and faster than ever.
Thanks to it, all images on your Magento 2 website will be converted to WebP in the blink of an eye.
Let’s learn it!
We hope this blog is helpful and good luck to you!
For example, you want to convert JGP format to WebP format on product pages, except for the images on the product A product page. All you need to do is fill in the product ID in the extension configuration.

Using this module, you don’t need to do manual image format changes anymore because all images on your website will be converted to WebP with only some clicks.
Step 2: In the panel, under the Catalog, choose Catalog.

The Best Solution To Optimize Your Images
Step 3: Expand the Expansion icon in the Product Image Placeholders section.
In this article, we will show you the fastest way to change or upload Magento 2 Placeholder Image.
Writing is a part of my life and I’m living for it.
By default, Magento uses its logo as the initial placeholder image, but you can easily replace it with your product image.
Magento 2 Placeholder Image can be useful in various situations to ensure a smooth customer experience and support brand marketing.
BSS Commerce is one of the leading Magento extension providers and web development services in the world. With experienced and certified Magento developers, we commit to bringing high-quality products and services to optimize your business effectively. Furthermore, we offer FREE Installation – FREE 1-year Support and FREE Lifetime Update for every Magento extension.
Step 4: For each image role, click Choose File, and upload the right image on your computer.
Highlight features:
Note: You can use the same image for all three roles, or you can upload a different placeholder image for each role.
Welcome to another Magento 2 tutorial!
CONTACT NOW to let us know your problems. We are willing to support you every time.
- Automatically convert images under other format (e.g jpg, png, jpeg) to Webp to optimize the loading and display speed of your website.
- Choose specific places you want to convert your images to Webp format: All, Product Page, Category Page, Home Page, CMS Page.
- Reduce time spent on conversion, automate every media upload, and deliver better-looking images.
Conclusion
Magento 2 Convert Images to WebP by BSS
Step 5: When complete, click Save.
To upload or change your placeholder images, follow these steps:
Not only that, but you can also choose not to convert some specific images on each page type.